Approval
Introduction
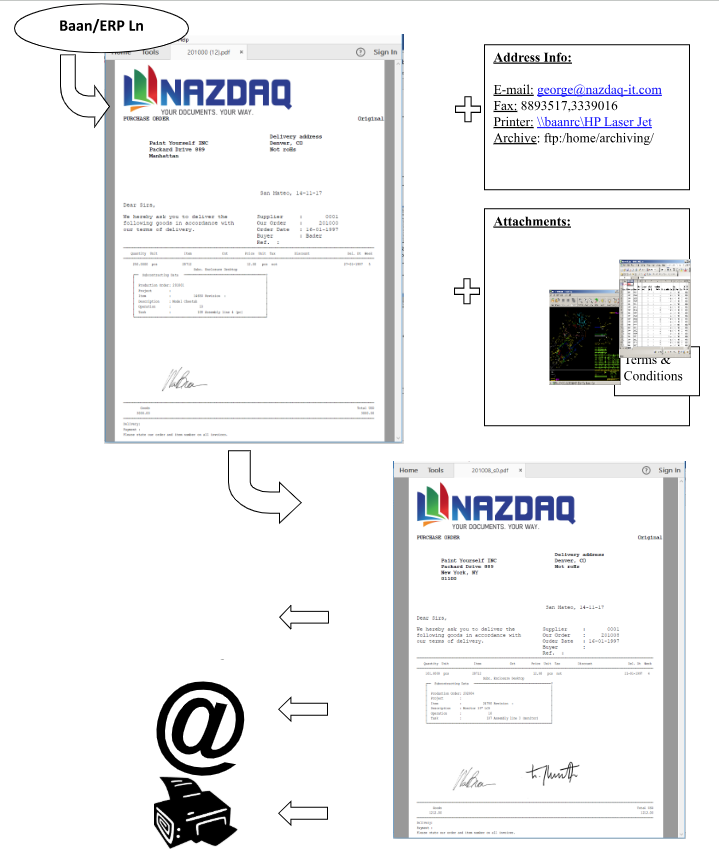
The B2Win Suite - Approval covers the area where the Smart Engine is used with reports such as purchase orders, and more than one person must sign certain orders, based on the amount.
Documents – for example Purchase Orders below the threshold amount are automatically signed by the buyer and sent out, while all other purchase orders are routed to the responsible manager for approval.
The manager assigned to sign the purchase order (or his/her assistant or backup) will be notified with an e-mail and will be directed to an approval session. If the purchase order is approved or denied, an email will be sent to notify the buyer or the next manager about the status of each order.
Approved Purchase Orders are now signed with a maximum seven signatures, one for the buyer and four more for the managers, and is ready to be released. Releasing purchase orders can be performed one-by-one which will release approved orders – or the buyer (or the manager) can check all approved orders that belong to him/her and manually release them, while adding some additional remarks or attachments.
Definitions
Defining Amount and Currency
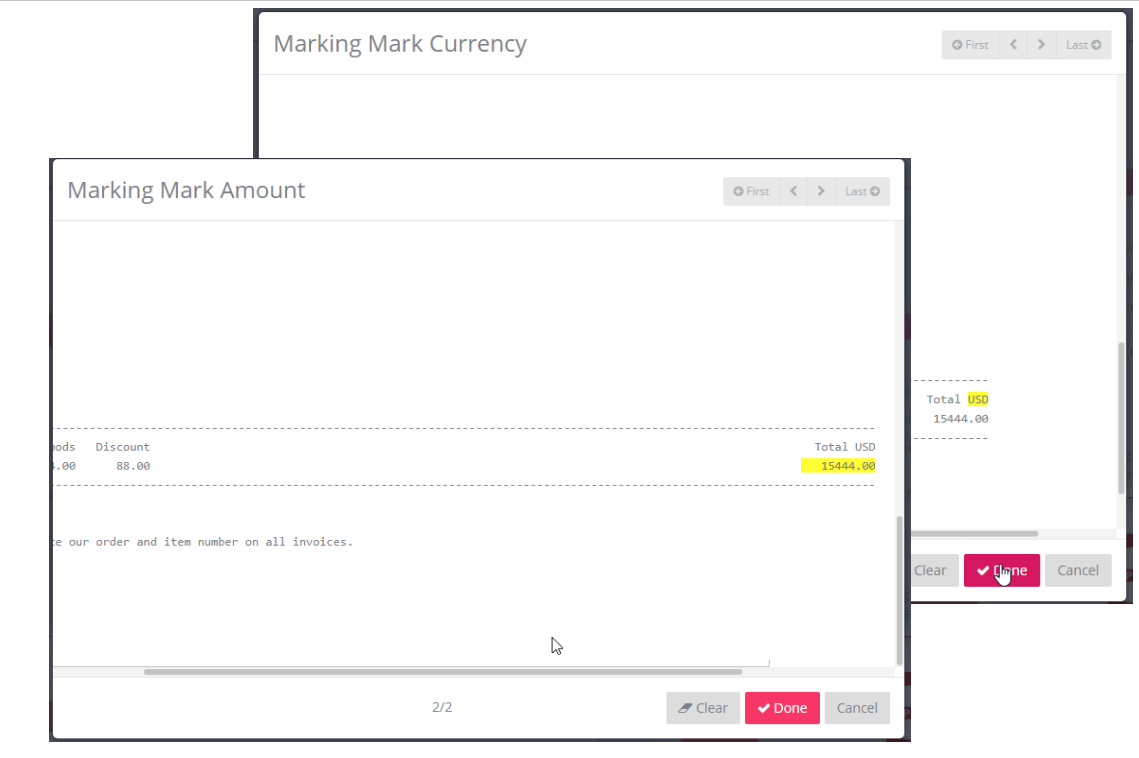
Amount and Currency can appear on the Smart Engine interface session, which will help the user see the amount involved in the document before it is sent. This amount sets the rules for a second signature in B2Win Suite - Approval
All you need to do is select the amount and the currency on the last page of every order.
**  **
**
**  **
**
Then Save Defaults
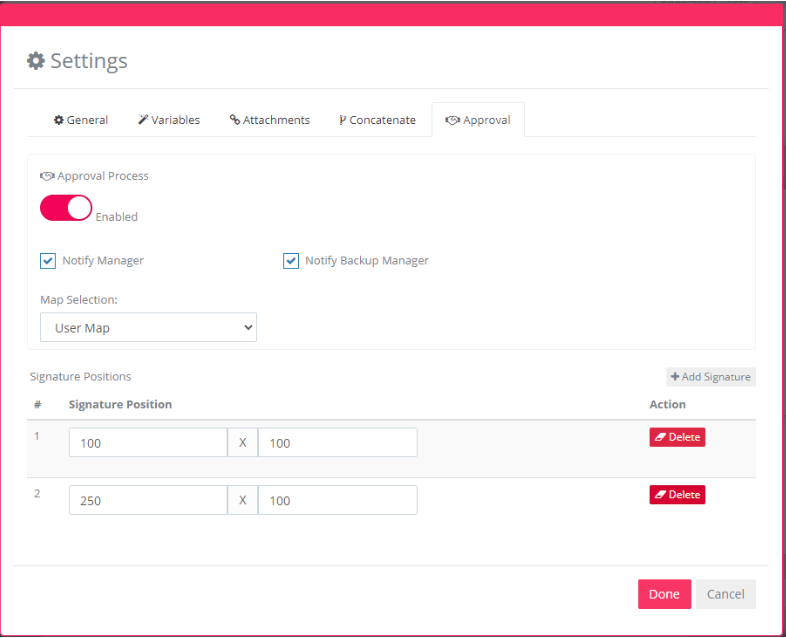
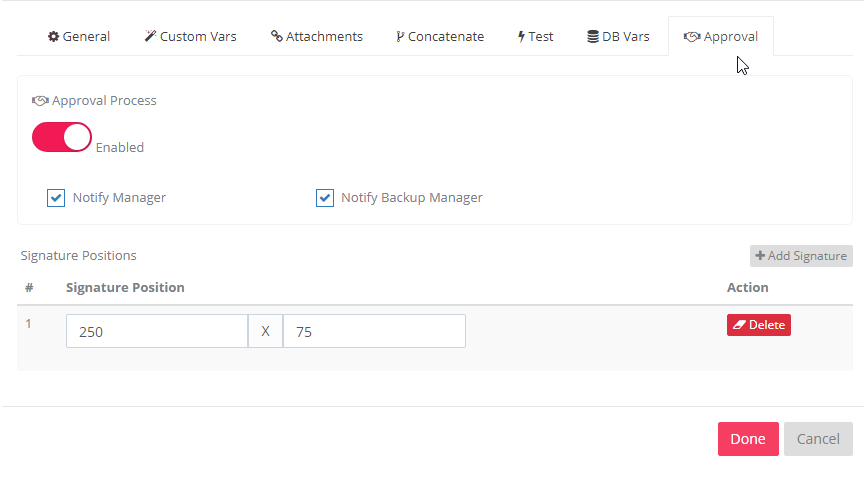
Defining the managers’ signatures positions
Leave this blank if you wish to use the default signature position in each manager’s profile. If you wish to fine-tune the location of all the other signatures (other than the first one) on the report layout, use the exact coordinates of the PDF file to sign in the exact location of your choice.
Here you should insert the x and y coordinates for each signature position.
Approval Process Maps
You can go to the Approval Process in the side bar, and click on Maps to define the Approval Process Map. Here the user can maintain the levels needed in each map, to sign the document. The user will have to set the manager user name and backup, give a description for the level, set if the backup is active, meaning is he allowed to sign or not, and whether the backup is signing with his signature or the manager`s signature.
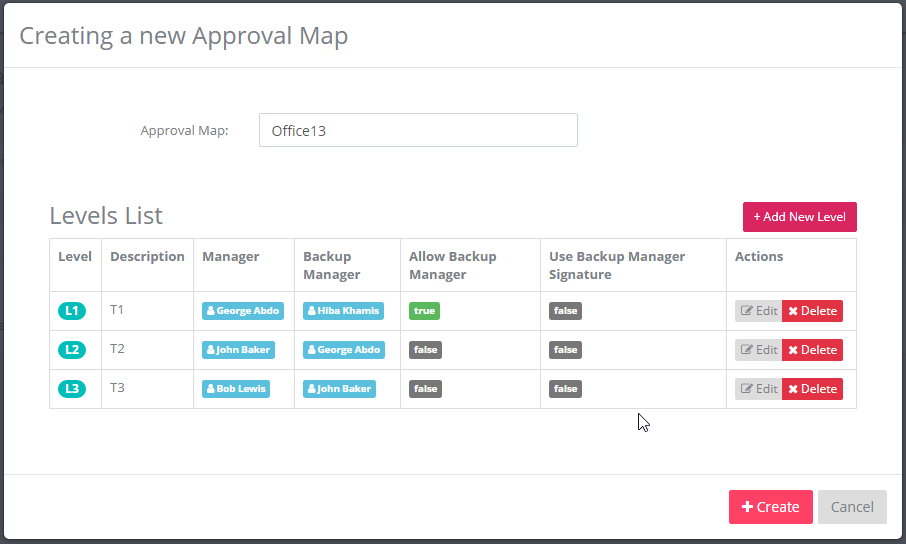
As an example, the screenshot has three levels. The first level of approval is the user George, who is the first manager. His back up is user Hiba, and the backup is active, meaning that he can sign now the order waiting for the manager George. If the backup user signed (user: Hiba) the signature used will be George`s.
Approval Process User Maps
After defining the maps, it is time to define for each buyer (who will print the documents for approval process) the map rules. Go to the Approval Process in the side bar in B2Win Suite and click on User Maps, you should define for each buyer a map and its rules. Each rule defines a range for the amounts and which levels from the map defined earlier should sign.
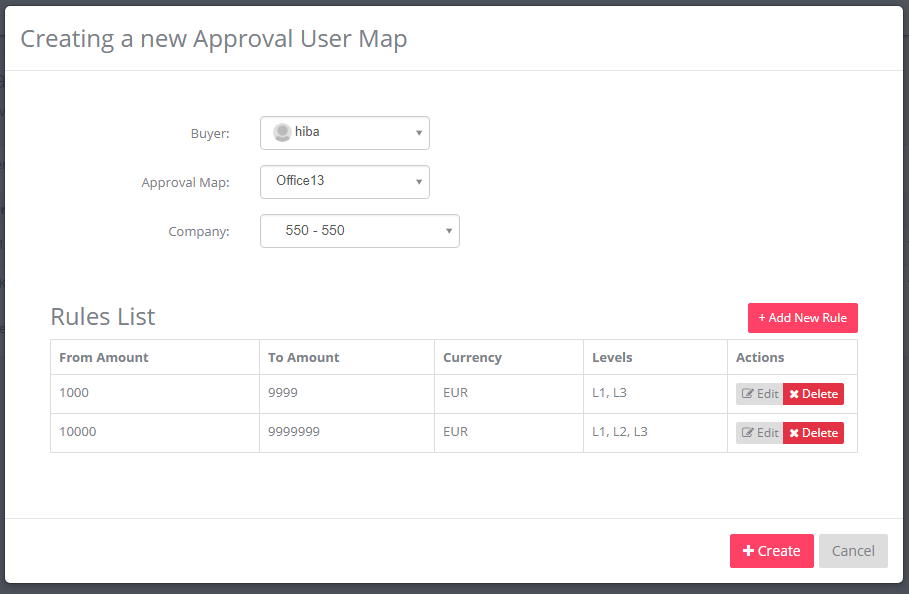
In the example screen shot we see the user hiba is set to use the OFFICE13 map. If the order amount is less than 1,000, then there is no need of a manager signature at all. If it is between 1,000 and 10,000 then two managers should sign it, first the one in level 1 and then the one in level 3 which are George and John from the previous example. If the order amount is higher than 10,000, then 3 managers will have to sign. And then the order will be ready for release.
Defining the Map Selection
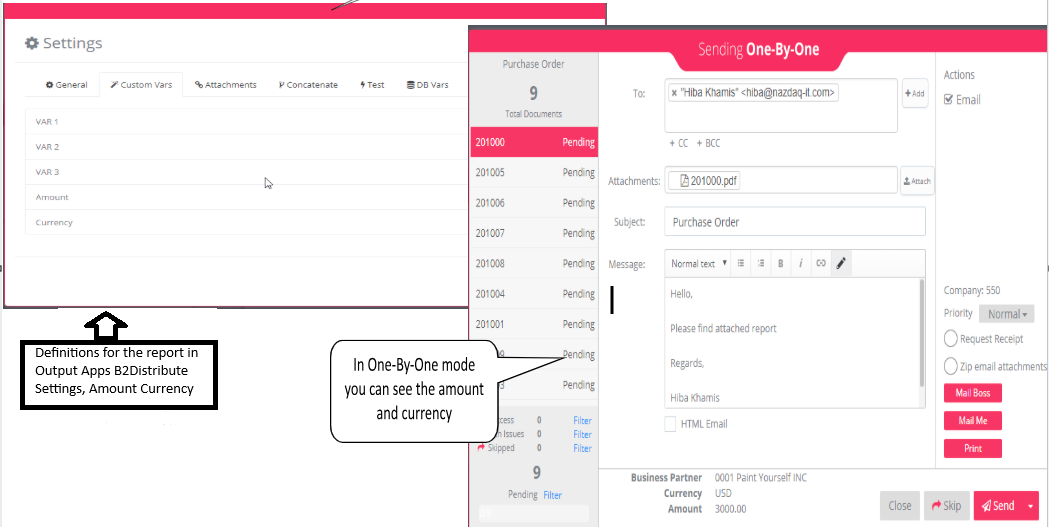
In the approval settings in Output Apps you can define the map selection.
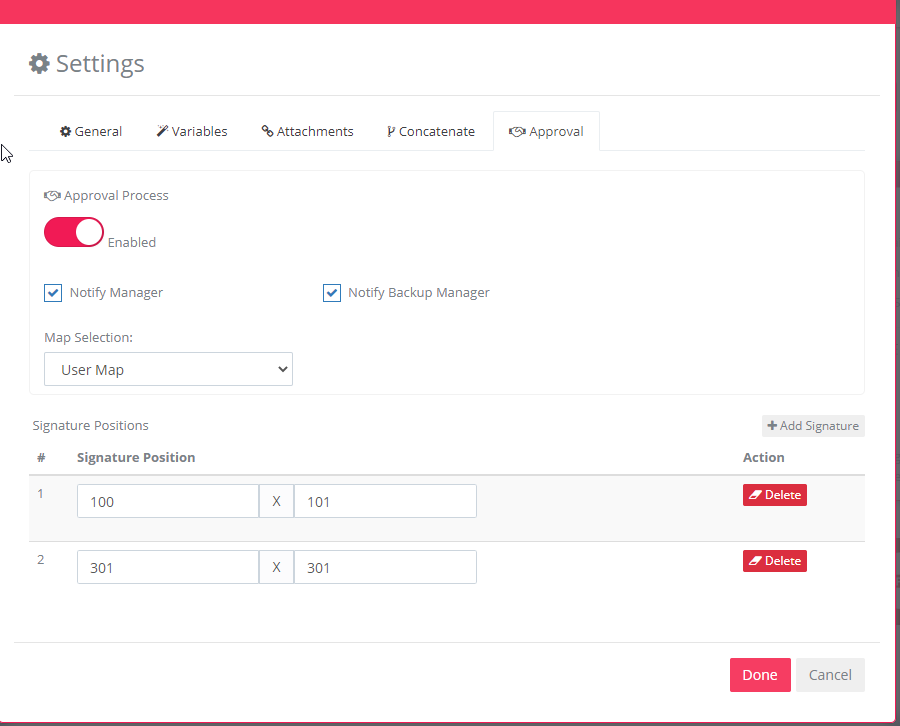
There are two options:
-
User Map
For each run, a user map will be selected according to the user that is running the report. The user map includes all levels and the amount rules that define the approval hierarchy.
-
Manual
In manual mode, for each document the user can select the map in One-By-One. And the approval hierarchy will be according to this map, this way the amount and currency will be ignored.
Defining Releasing Method
If you wish the buyer to be able to display approved purchase orders and release them – choose System from the B2Win Suite sidebar, go to System Settings and set the Approval Allow Release for to Buyer Only. Or if you wish to allow only the manager to release documents then you can set it to Manager Only. And you can set it to All if you wish to allow everyone to release approved documents.
Usage
The Purchase Approval Process: How does it work?
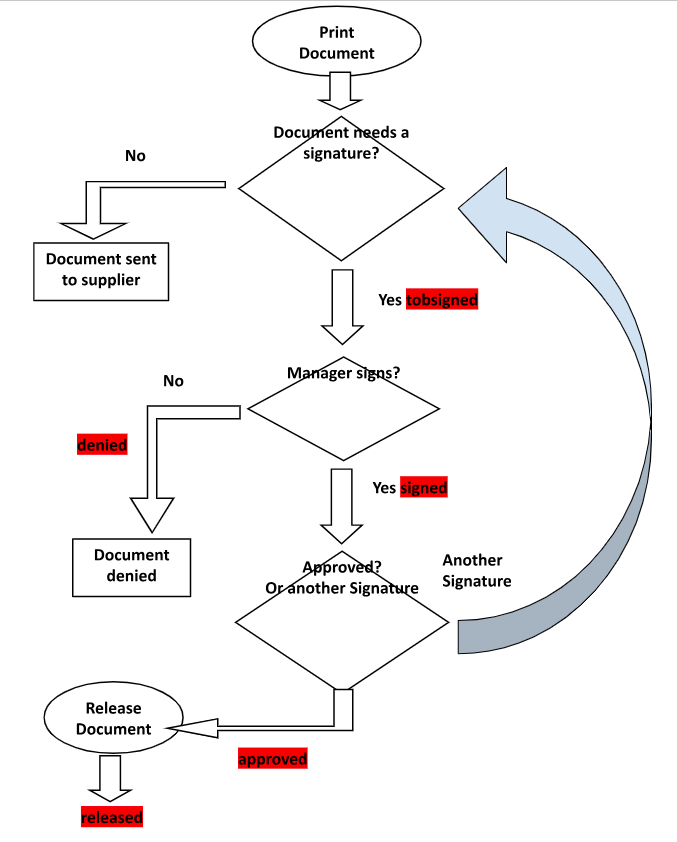
The document (for example Purchase Order) goes through the following Process before it is sent:
Approve a Document
After a Document was printed by B2Win Suite – Smart Engine, it is signed by the buyer and is routed for a second signature (If Company Rule requires a second signature).
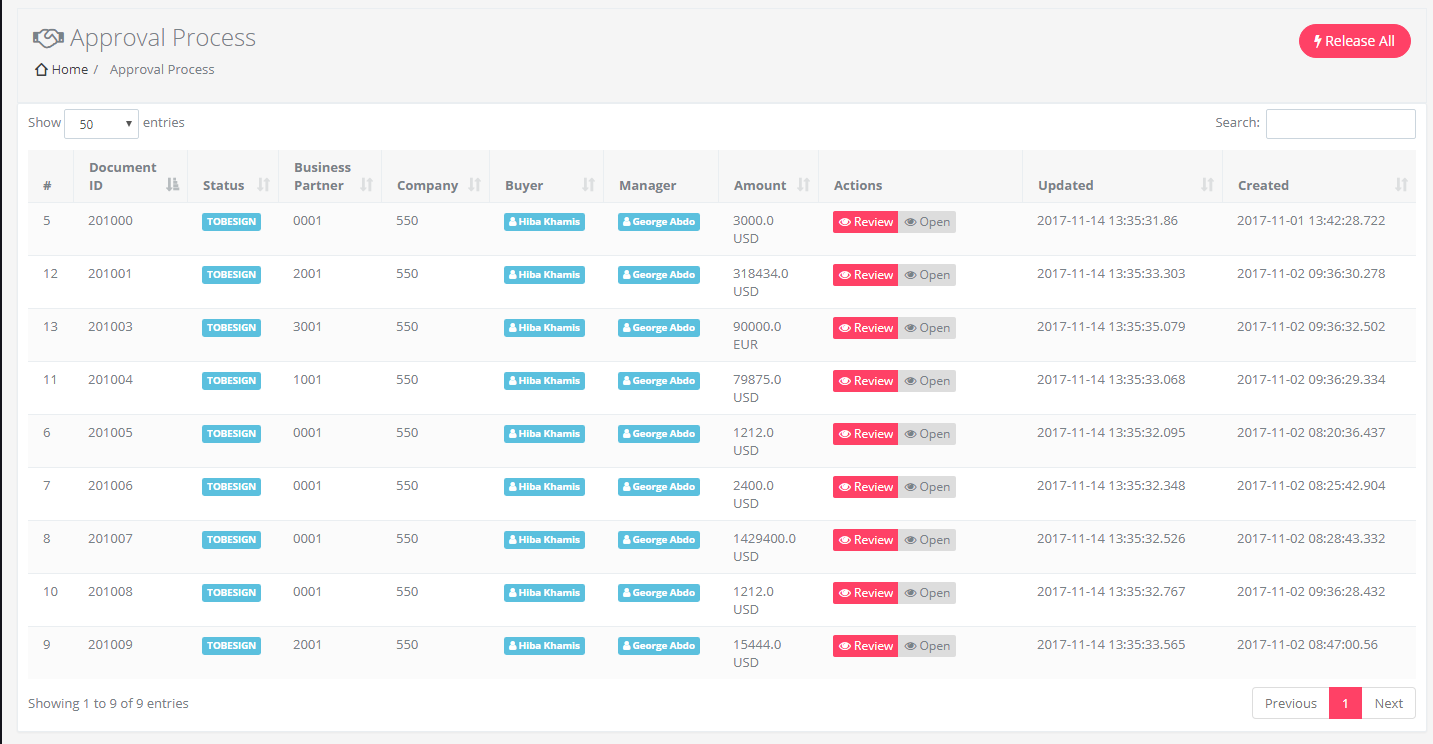
The manager (or backup manager) can view documents that are waiting for approval when he clicks on Statuses under the Approval Process in the side bar in B2Win Suite.
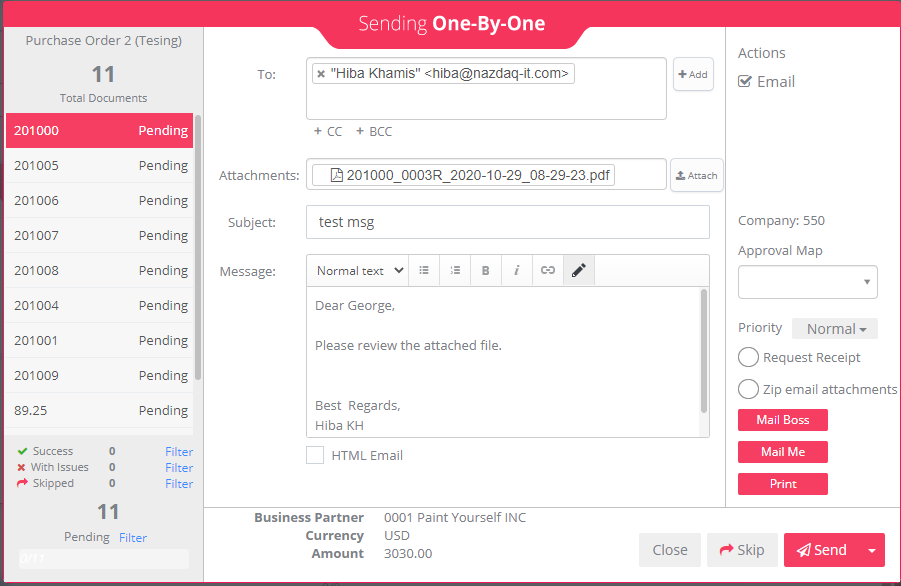
After choosing a Document and clicking on the “Review” button, the manager receives the following screen:
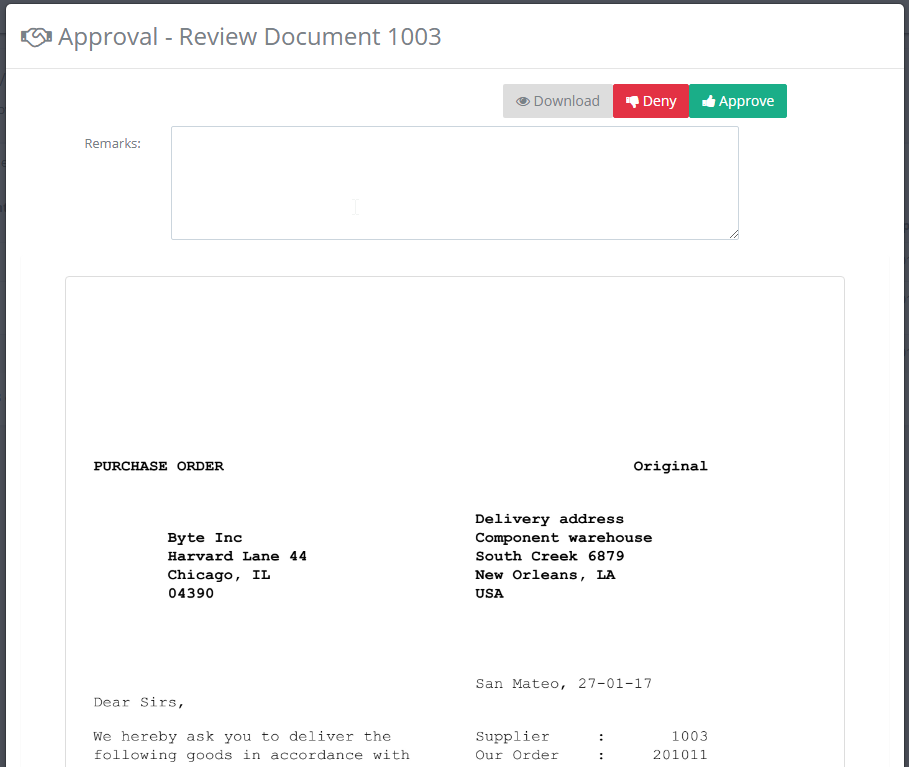
If the manager denies the document then an e-mail will be sent to the buyer with the manager’s decision and remarks.
In case the manager approves then a notification email will be sent to the next manager if another signature is needed. Such notification can be allowed in the report settings, for manager or backup manager if active.
If the manager approved the document and his signature was the last one then the document will be approved and waiting for release.
Releasing Approved Documents
Releasing
Based on the definition by the system, the buyer or the manager has the capability to release individual purchase orders that belong to them, by viewing them and then releasing them. This is done through the same Statuses page, which will show the user all documents that he can release (or approve)
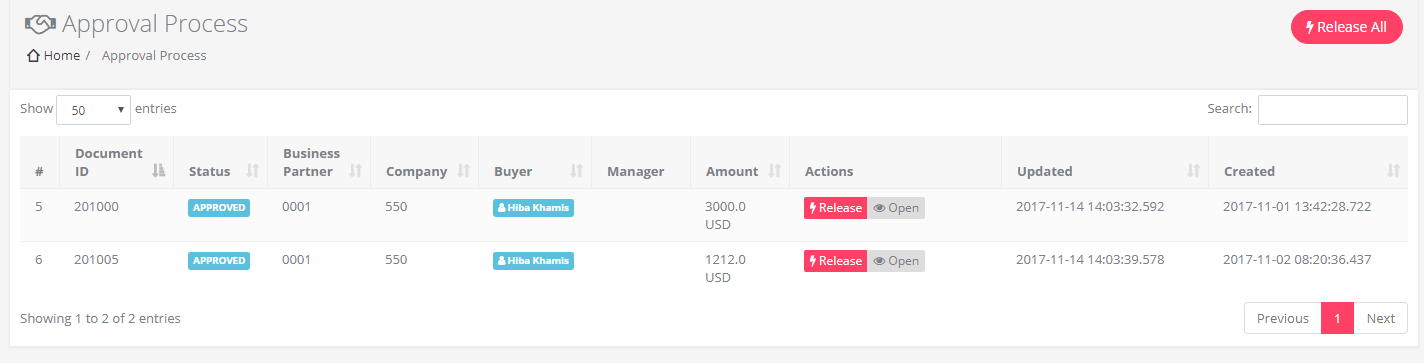
Releasing in a batch
For releasing all documents in a batch (in full automatic mode), click on Release All and all approved documents will be sent to their destination as defined in the B2Distribute settings.
Running in Auto-Mode will not result in any screens to show. The approved documents will silently be sent to the designated recipients (Based on the original Smart Engine logic).
History
Documents history in Approval will show all the documents and their current status:
2bsigned, approved, released, denied, void
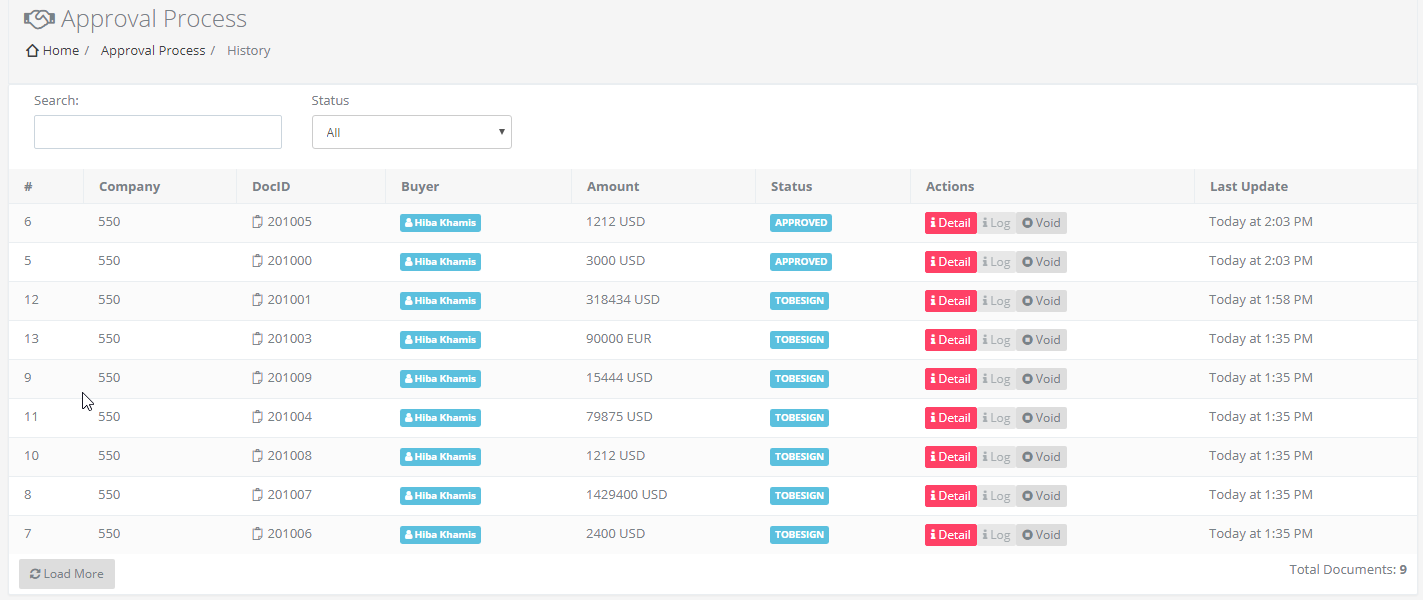
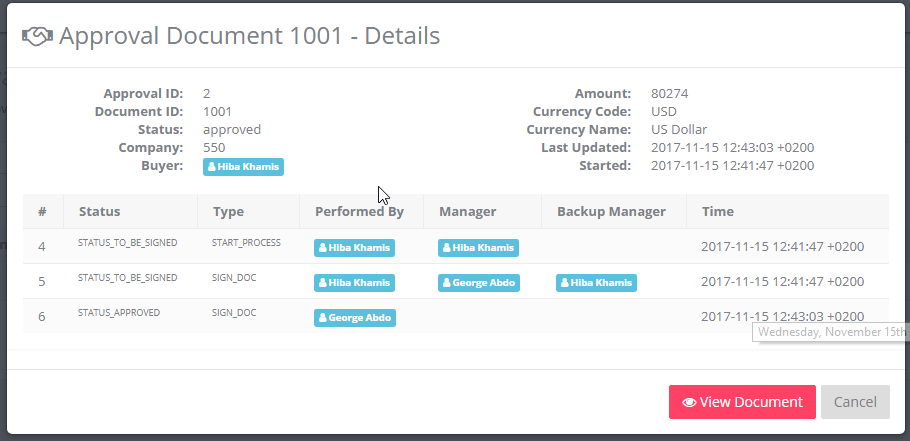
Choose a document and click on “Detail”, you can see the document history.
Void a Printed Document
You may sometimes wish void a certain document, so that you can reproduce a recent copy from your ERP system, using the Smart Engine. For that you can go to Approval Process History, choose the document you need to void, and click on void button.
