Workflow Execution
After we have built our workflow now it's time to talk about execution the workflow and viewing the results it generate, whenever you configure a workflow and build it directly is converted into a runtime execution which can be executed per path per node or the whole workflow nodes which appear in canvas.
The workflow can be execute through a trigger or manually through the Run button or by specifying a specific node and execute it separately
Bottom Panel
In this panel you can see the history or currently running iterations and can view them from here:
Iterations
In B2Data, workflow execution revolves around iterations. An iteration is created whenever a workflow runs, whether triggered manually, through an input form, or via a trigger node. Each iteration is assigned a unique Iteration ID, starting from 1 and incrementing automatically.
- Manual Execution: If the workflow is valid (with at least one configured source node), it can be run manually using the Run button.
- Trigger Execution: A trigger node (e.g., Scheduler or File Listener) starts a new iteration automatically when its conditions are met.
- Viewing Iterations: The top-left corner of the canvas displays a dropdown where you can select an iteration to view its details, inputs, outputs, and logs.
Node Execution
Each node in the workflow is executed under the current iteration, generating Node Executions. Node Execution tracks the processing of a specific node during that iteration.
Key Features:
-
Execution Messages: Nodes can produce runtime messages:
- Information: General updates or status.
- Warnings: Potential issues that do not halt execution.
- Errors: Critical issues that stop the node from completing successfully.
Messages are indicated with icons under each node on the canvas. Hovering over the icon reveals detailed information.
-
Progress Tracking: Each executing node displays a progress bar to indicate completion percentage.
-
Execution Options:
- Execute from Here: Allows execution to start from a selected node, skipping predecessors while retaining their state.
- Re-Execute: Executes only the selected node, clearing outputs of subsequent nodes to ensure consistency.
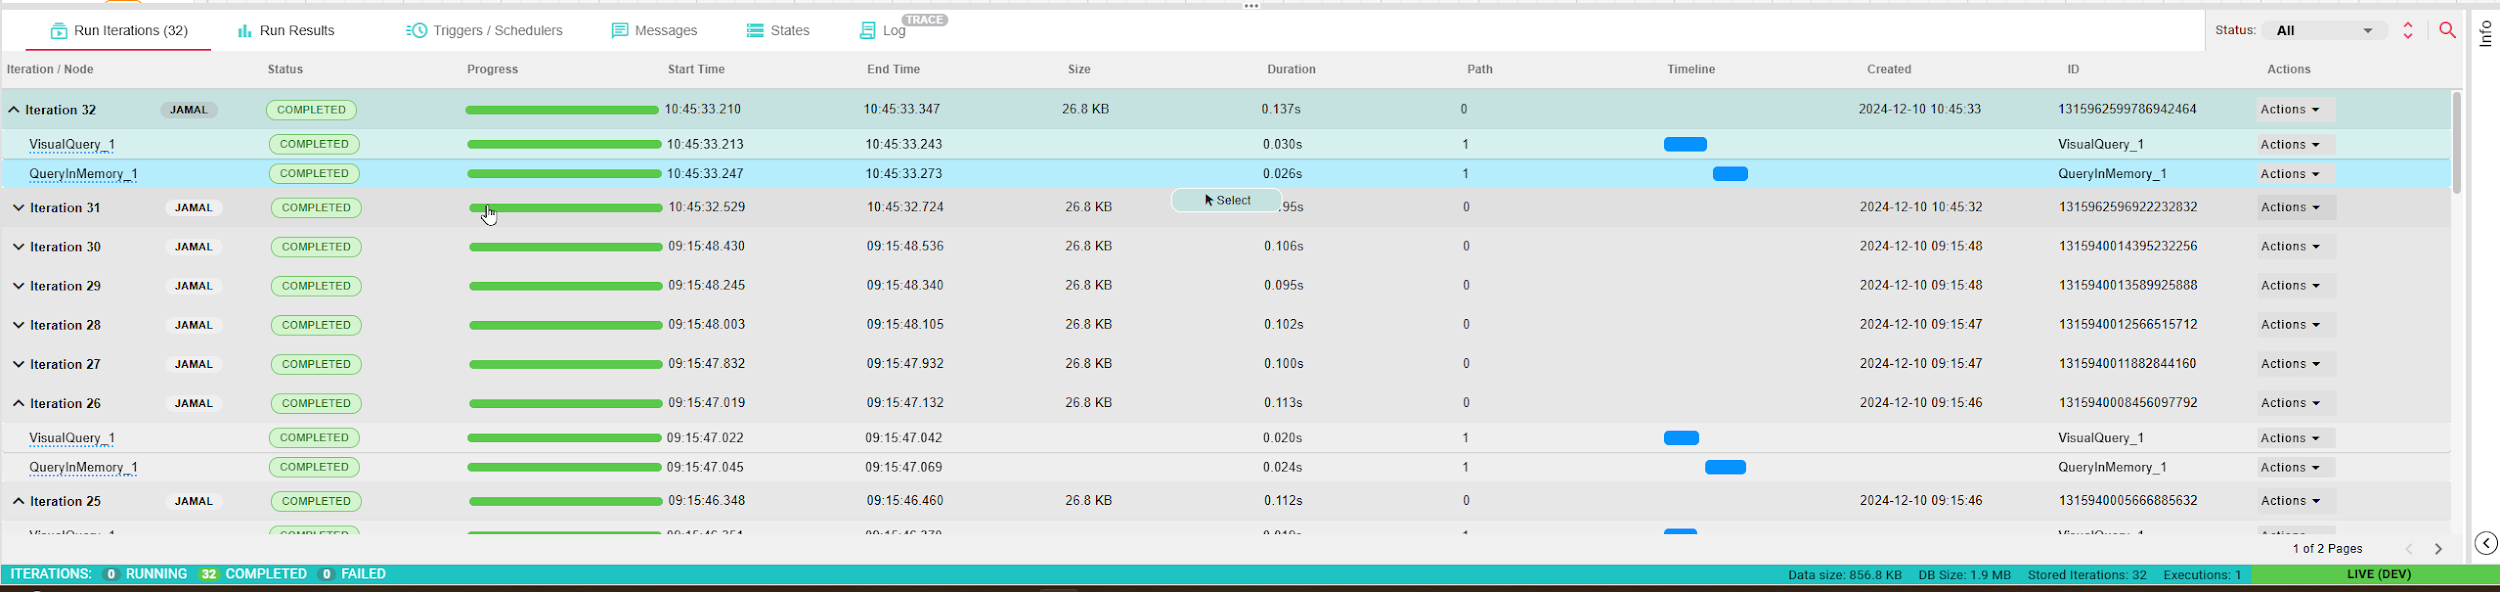
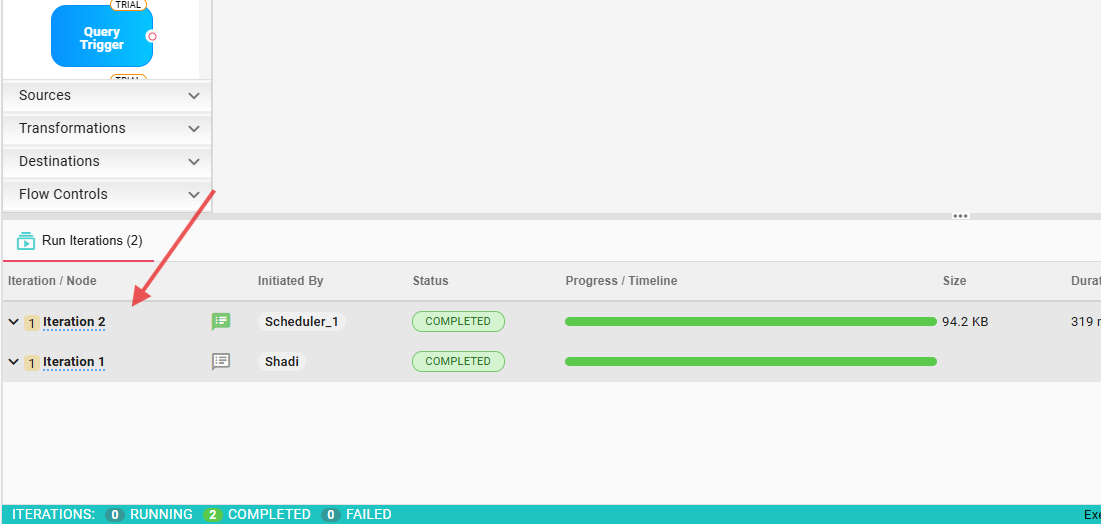
To view specific iteration you can select the iteration from the Run Iterations tab:
Paths
In B2Data, a workflow is represented as a Directed Acyclic Graph (DAG) on the canvas. The canvas allows you to create multiple independent DAGs, known as paths, within the same workflow. Each path can be executed separately or as part of the entire workflow.
Multiple Paths on the Canvas
- Independent DAGs: Nodes that are not connected to each other form separate execution paths. Each path operates independently but exists within the same workflow canvas.
- Execution Flexibility: You can choose to:
- Execute an individual path.
- Execute all paths together.
Path Execution
To control path execution, use the Path Dropdown Box located at the bottom of the canvas:
- Execute a Single Path:
- Select a specific path from the dropdown box to focus on one part of the workflow.
- Only the selected path will execute.
- Execute All Paths:
- Choose the "All Paths" option from the dropdown box.
- All independent paths in the workflow will execute simultaneously.
Path-Specific Triggers
Each path can have its own trigger node, enabling more granular control over execution. For example:
- Path 1: Configured to run on a Scheduler Trigger that fires every day at 6:00 AM.
- Path 2: Configured to run on a separate Scheduler Trigger or a File Listener Trigger.
This allows you to schedule and manage the execution of individual paths independently within the same workflow.
Use Cases for Multiple Paths
- Modular Workflows: Create modular and independent workflows within a single canvas.
- Parallel Execution: Run multiple paths simultaneously to optimize processing time.
- Trigger-Specific Execution: Assign different triggers to control when and how each path is executed.
- Focused Debugging: Test and debug specific paths without affecting other parts of the workflow.
Example Scenario
Imagine a workflow where:
- Path 1 fetches data from a database every morning using a Scheduler Trigger.
- Path 2 processes files using a File Listener Trigger when new files arrive.
- Path 3 sends a report summary once both paths are complete.
In this case:
- Each path is executed based on its own trigger.
- You can select and execute paths individually for testing or debugging.
- Alternatively, you can run all paths simultaneously to execute the full workflow.
Managing Paths in the Workflow
- The Path Dropdown Box provides visibility and control over all available paths.
- The canvas visually distinguishes independent paths, making it easy to design and manage complex workflows.
Messages
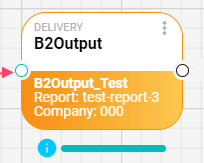
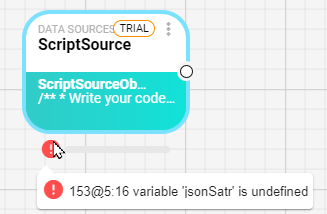
When the node is executed it can generate 3 types of messages: error/warnings and information to be displayed to the user, under each node you should have an icon if there is any messages that were generated on Run-time, if you hover over these icons you can see the message itself, here is an example of information message:

And another error message:
Partial Execution
For testing or debugging workflows, you can execute parts of a workflow instead of running the entire process. This is particularly useful for workflows with long-running nodes.
- Execute from Here: Executes the selected node and all subsequent nodes in its path.
- Re-Execute: Reruns only the selected node, clearing outputs of all downstream nodes.
You can execute a node and all the nodes that comes after it see this scenario here:
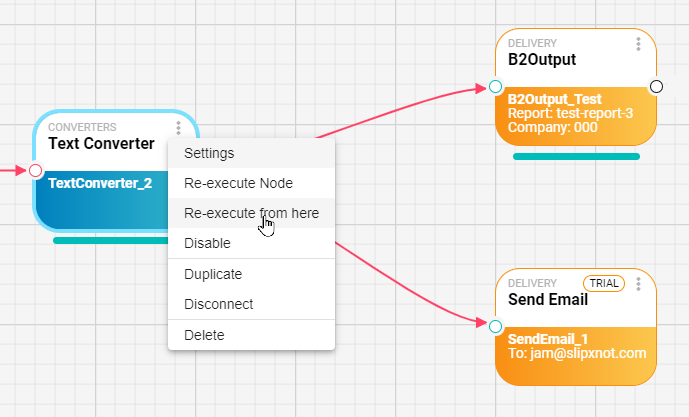
In this example if we Re-execute from here only 3 nodes will be executed:
Text Converter/B2Output and Send email, all the predecessor nodes will still have the previous data already stored in it.
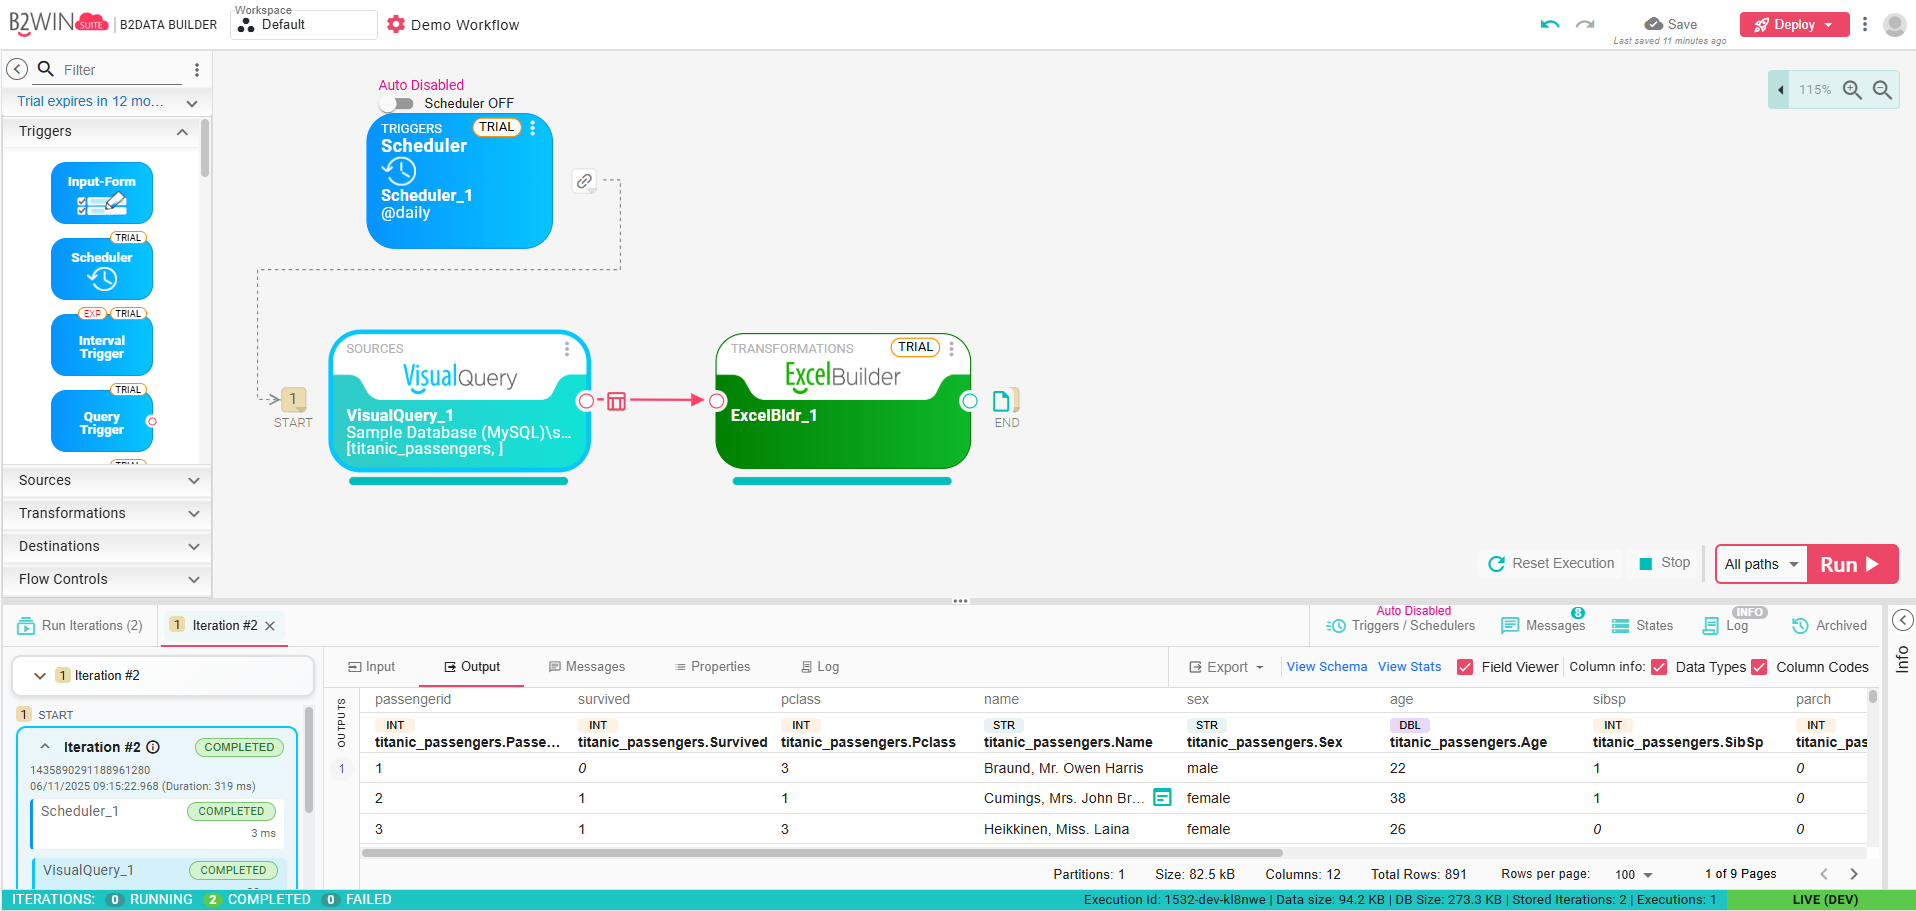
Logs/Data and Properties
During execution, logs and output data for each node can be viewed:
- Logs: Messages generated at runtime.
- Node Input/Outputs: Results such as files, URLs, DataFrames, or objects can be previewed or downloaded.
- Node Properties: The list of properties which was created/passed from the previous nodes or from the workflow global properties, in here you can see all of them for debugging.
Resetting and Managing execution
Stop Workflow: Disables all active triggers and prevents further executions.
Reset Workflow: Clears or archives existing iterations and restarts the workflow with a clean state.
Archived Executions: Previous executions (including their iterations and outputs) can be revisited later for debugging or analysis.
Progress
At a glance, you can monitor workflow execution progress:
- Nodes display progress bars.
- Success or failure is visually represented using node colors and icons.